How to Add Data Sources
Once the data model is built under Namespace, you need to connect real data to the model for subsequent processing and use.
Adding Data Flow Manually
- Log in to supOS, go to UNS > Source Flow.

| Index | Item | Description |
|---|---|---|
| 1 | Name | Click the flow name to start editing the data flow. |
| 2 | Flow Operations | Copy / Edit / Delete the data flow. |
| 3 | Search | Search for existing data flows. |
| New Source Flow | Add a data flow. |
- Click New Source Flow, enter a name and click Save.
- Click the flow you just added, and drag in nodes according to your data source type (e.g.
modbus). - Drag in an mqtt out node, and finish its configurations.
Add the internal broker via
emqx:1883.
Set its subscription topic to the data model in Namespace.
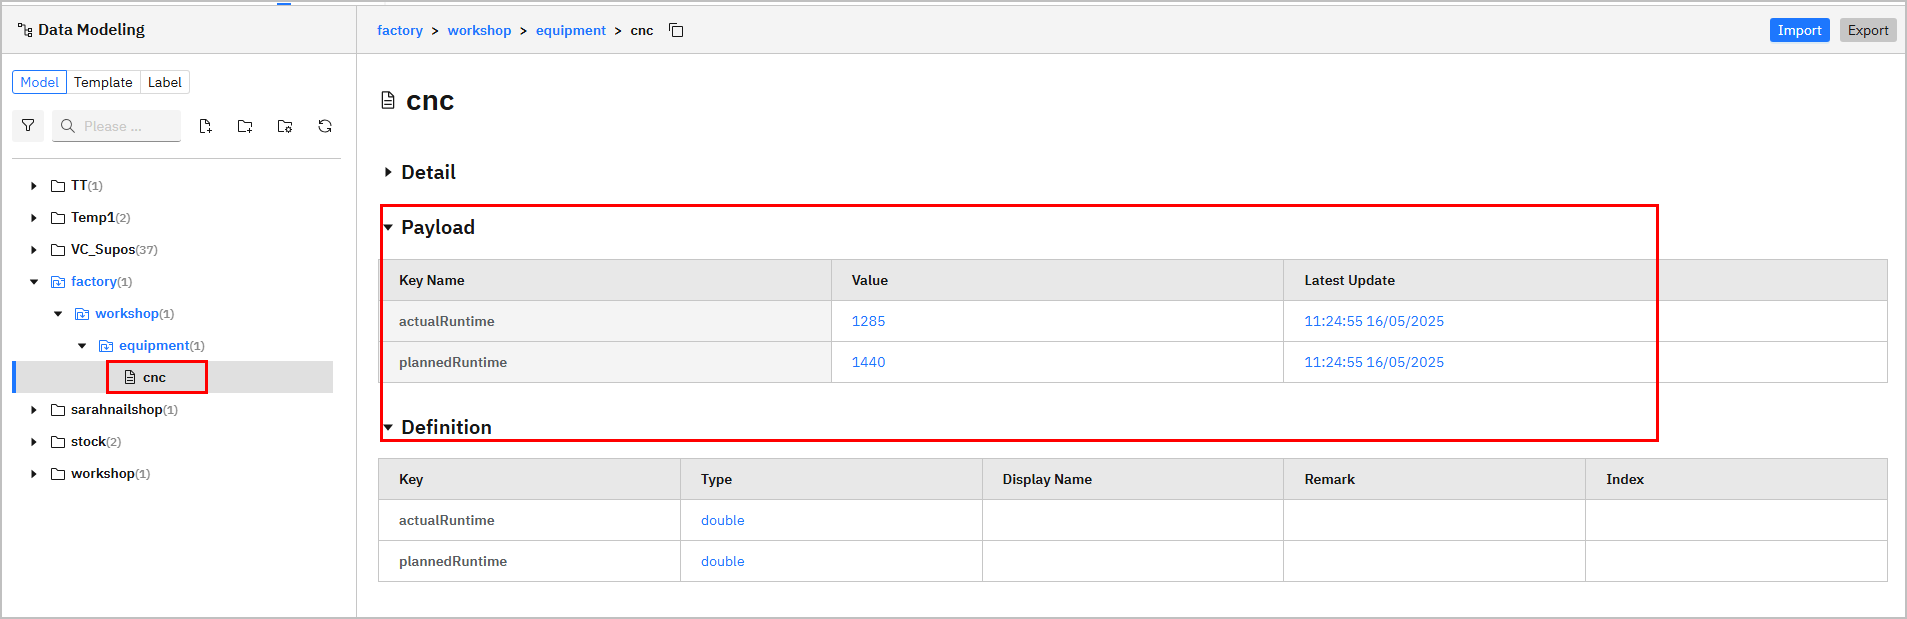
For example, the data model structure is
factory/equipment/cnc, the topic will befactory/equipment/cnc.
- Click Deploy at the upper-right corner, trigger the flow and the data will be sent to corresponding model under Namespace.
Configuring Data Source through Generated Flow
- Log in to supOS, go to UNS > Namespace, and under the Topic tab, select a file.
- Scroll down to Topology, click the icon on Source Flow to redirect to the generated data flow under Source Flow.
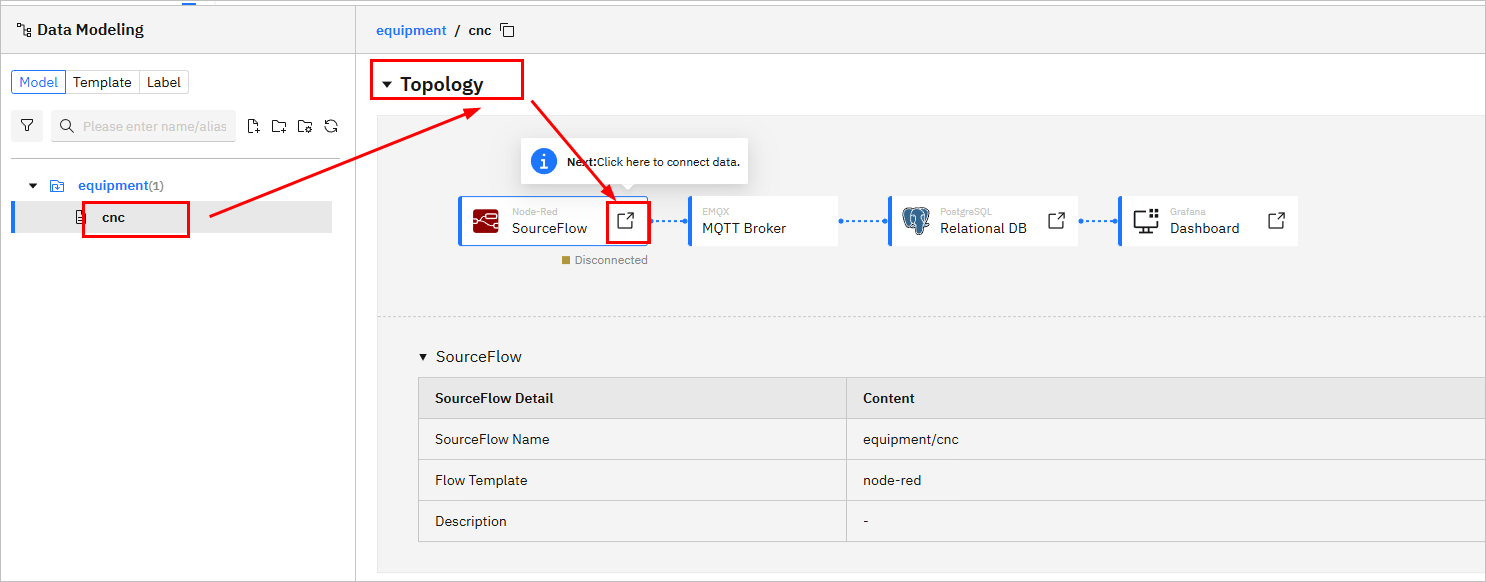
- Change the data source of the generated flow.
info
Make sure the returned data of the source node is JSON object. Currently, supOS can only parse this data type.

- Delete the mock data node and connect the source node to the rest of the flow.

- Click Deploy at the upper-right corner, and then trigger the flow.
- Go back to Namespace, check whether the data is sent back to the file (data tag).